

Trying to make a collage in Photoshop? You’ve come to the best place.
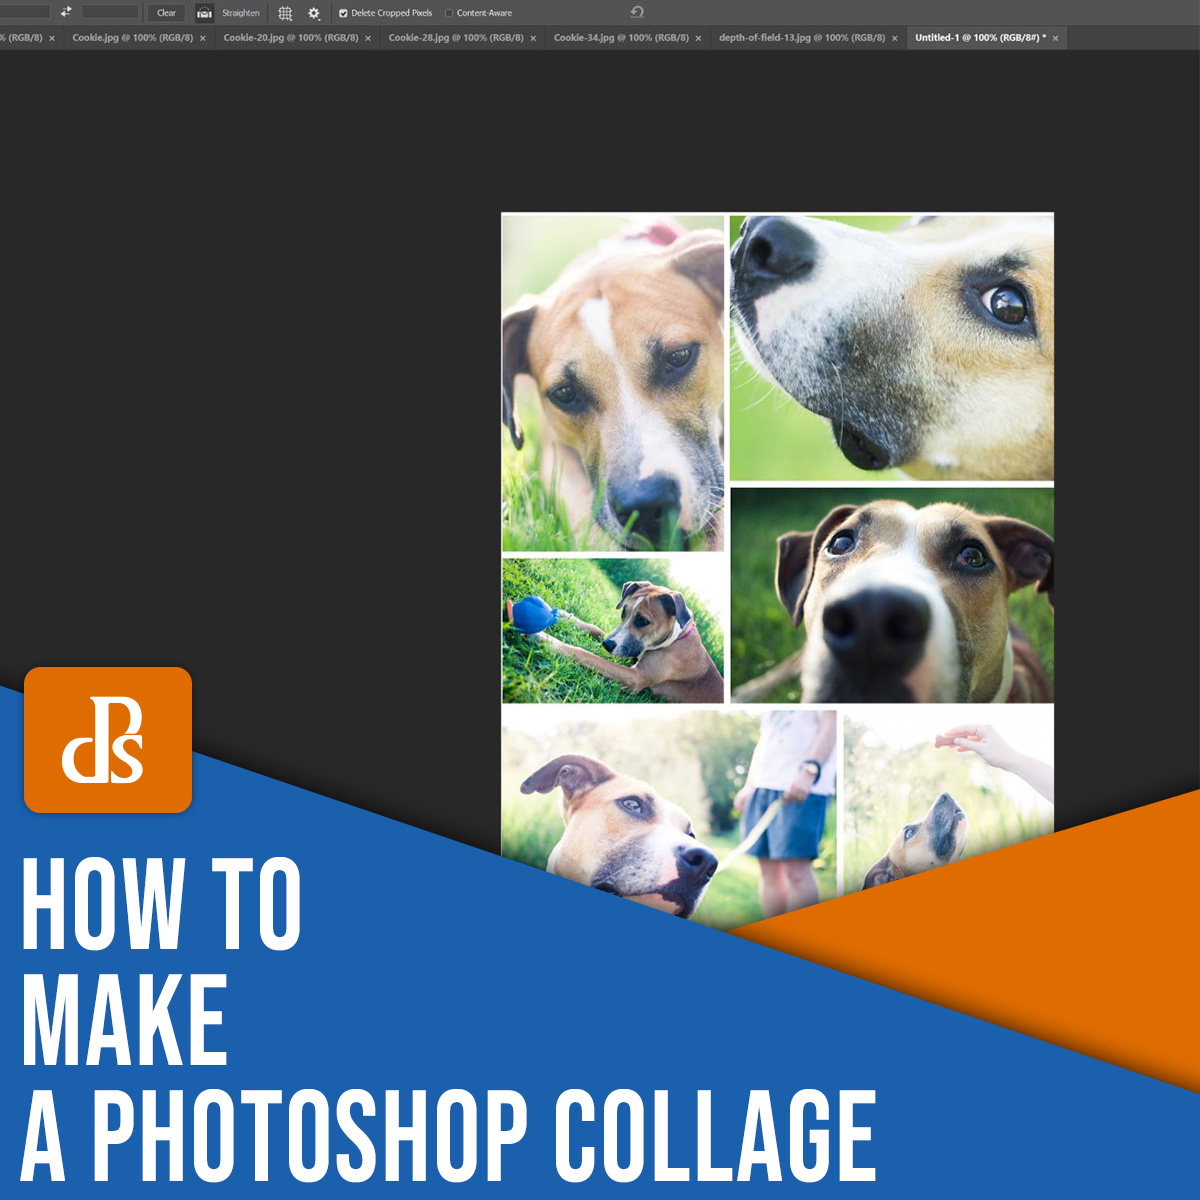
On this article, I’m going to offer you a straightforward, step-by-step course of for creating a shocking collage – one that appears like this:

(It’s a good strategy to share photographs from an occasion, a real-estate shoot, or perhaps a household picture session!)
Let’s get began.
Step 1: Select your collage photographs
Earlier than you really create the collage, you’ll want to choose your collage photographs – and also you’ll want to do that fastidiously.
I like to recommend deciding on photographs linked by a theme (reminiscent of a location, an occasion, or perhaps a idea). Embody a mixture of topics at completely different scales; as an illustration, decide some vast pictures that present all the scene, in addition to some element photographs that present numerous texture and persona. With out one or the opposite, the story received’t be full. And it received’t carry the extent of emotion that you just’re after.
Talking of storytelling: It usually does assist to give attention to the story you’re making an attempt to inform. Do you need to supply a story surrounding an occasion? Do you need to clearly convey a significant idea? Be certain that to take this under consideration when selecting photographs!
Yet one more tip: If attainable, embrace at the least three photographs and not more than eight. Too few photographs, and also you received’t have the ability to inform the complete story. Too many photographs, and also you’ll confuse the viewer with litter (plus, it’ll be powerful to indicate off particular person particulars).
Step 2: Open the chosen photographs in Photoshop
When you’ve picked your photographs, open all of them in Photoshop.
To do that, you possibly can drag and drop information straight onto the doc window, or you possibly can choose File>Open and click on on the related photographs.

You need to see the photographs as separate tabs within the doc window, like this:

Step 3: Create a brand new file in your Photoshop collage
Each Photoshop collage wants a background file the place all the pictures will ultimately be assembled.
Whereas you need to use an previous collage template, in case you’re making your first-ever collage, you’ll have to create a brand new doc.
So choose File>New within the Menu bar (or faucet Ctrl/Cmd+N):

A New Doc window ought to pop up, and also you’ll have to dial in your file preferences.

The specifics will depend upon what you propose to do with the collage in addition to the sizes of your chosen photographs. For those who’re working with huge JPEGs and also you intention to print, you must most likely decide a 5000+ pixel width and top. If you wish to show your collage on an ordinary net web page, nonetheless, a 1500 pixel width and top will just do nice (although you possibly can at all times begin huge and resize later, as mentioned in Step 8 beneath).
(I do suggest you make the file measurement a bit bigger than the scale you need ultimately; that method, you are able to do a remaining crop to take care of any association points.)
Step 3: Add your photographs one by one
Head to your first open picture, then choose it.
To do that, you possibly can drag with the Marquee device:

Or you possibly can hit Ctrl/Cmd+A. You need to see the marching ants across the border of your picture:

Then select Edit>Copy (or faucet Ctrl/Cmd+C):

Lastly, head over to the brand new doc, then select Edit>Paste (or faucet Ctrl/Cmd+V):

It will add the picture to the clean doc, however by itself layer.
Relying on the scale and backbone of the brand new picture, chances are you’ll have to make some changes with Edit>Free Remodel (or Ctrl/Cmd+T). For example, my first picture was method too giant:

So I used the Free Remodel choice to scale it down:

(When you’ve activated Free Remodel, merely drag the sting nodes till you get the end result you’re after. You need a picture that’s sufficiently small to be comfortably moved across the canvas.)
Then repeat the above directions for all of the remaining collage photographs.
Step 4: Organize your photographs
After you’ve added all of the collage photographs to your doc, it’s time to do some arranging. That is the place you shift the photographs round till they inform your story.
After doing a number of collages, you’ll begin to uncover your most well-liked fashion; personally, I wish to create symmetrical layouts in addition to interlocking puzzles. However every story does have barely completely different wants, so don’t be afraid to experiment!
To regulate the picture positions, you possibly can choose the Transfer device (or faucet V):

Then drag round all the pictures till you get end result. For those who’d wish to resize any photographs, use the Free Remodel choice mentioned above.
With my pet collage instance, I first tried a extra symmetrical association:

However I settled on a puzzle-type composition:

Step 5: Add picture spacing
When you’ve decided the format and also you’ve sized all the pictures, I like to recommend giving the design some house. It’s private desire, however the impact is mostly good.
In different phrases, as an alternative of a collage like this:

You need one like this:

It’s fairly simple to do; you merely create a skinny, white border between the pictures. You may choose every picture, then use the mouse or arrow keys to tug till you see white house. Or you possibly can double-click on every picture within the Layers panel:

It will open the Layer Type menu, the place you possibly can choose the Stroke choice:

Be certain that the Place is about to Inside, the Mix Mode is about to Regular, and the colour is about to White:

Then improve the Measurement till you see a pleasant border showing round your photographs.

Sadly, this may crop the pictures considerably – however relying on the look you want, it is perhaps value it.
Step 6: Merge all layers
At this level, you must have your collage laid out with good picture spacing.
Which suggests you’re able to merge all of the layers.
Merely choose Layer>Merge Seen (or faucet Ctrl/Cmd+Shift+E):

And the layers will merge right into a single lovely Photoshop collage!
Step 7: Crop the ultimate picture
Earlier than you resize and export your collage, I like to recommend cropping any further white house across the edges (you need the design to look even).
Simply hit C or choose the Crop device:

Then drag on the edges of the picture to do away with any undesirable areas:

Step 8: Resize
This step depends upon your objectives for the collage. If you wish to print, you’ll have to resize based mostly on printing necessities (which can usually contain leaving the picture fairly giant). If you wish to put up your collage on Fb, Instagram, or Pinterest, nonetheless, think about sizing right down to a most of 1500 pixels on the lengthy finish.
So choose Picture>Picture Measurement (or faucet Alt/Decide+Ctrl/Cmd+I):

Then dial in your most well-liked width and top.
Step 9: Save and export your collage
Final however not least:
Save and export!
You’ll need to choose File>Save As:

Then select a location and file identify, guarantee that Save as kind is about to JPEG, and hit Save:

And choose your most well-liked picture high quality (I normally go for round 8):

And also you’re carried out! Photoshop will save your collage within the specified location.
How you can make a Photoshop collage: remaining phrases
Nicely, there you might have it:
A easy course of for making a collage in Photoshop. It’s sure to look nice, so don’t be shy; share it throughout your social media pages!

